
Electric Fencing for Livestock
By Jeffery Heppler
A Field Trip to Prairie Turnip Farm
Electric fencing from a permaculture perspective is used to provide disturbance to the land in sensible doses that mimic the large herds of grazers across the prairie not so long ago. By having smaller paddocks that are more densely stocked, pressure from predation is also mimicked. This ensures the land is more evenly grazed, that certain, less palatable/desirable species do not go uneaten or untrampled. The rancher makes the decision as to what animal will provide that disturbance and to what degree. Different species will shift the succession of a pasture into grassland, forbe-rich prairie, savannah, scrubland, or forest.
Earlier this year, a few of us went to visit Hank and Joanna’s ranch, Prairie Turnip Farm, located south of Topeka, Kansas. There they have herds of sheep, highland cattle and several other livestock on 60-plus acres, all managed using electric fence. Our interest in visiting the farm was to how to scale up and, just maybe, simplify our current setup of electric netting and solar-powered energizers for our livestock.
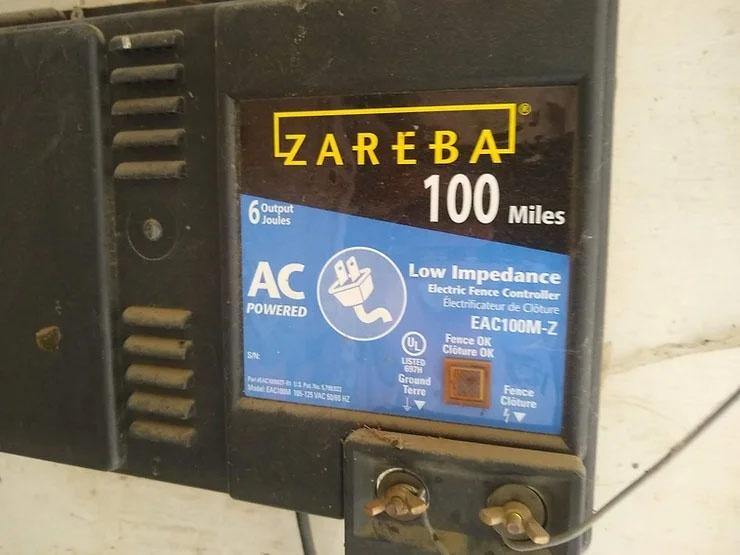
We show up a bit before noon, making acquaintance with Hank under the shade of a large set of trees surrounded by birds near the house. Soon, we begin to walk to a nearby barn, which houses the AC (alternating current) low impedance energizer (Figure 1). It is rated at 100 miles and 6.0 Joules of output; which Hank admits is a bit overkill for his roughly 20 miles of fence. When shopping for an energizer, be sure to research what is right for your situation. Remember, it is easier to plan your system with expansion in mind.
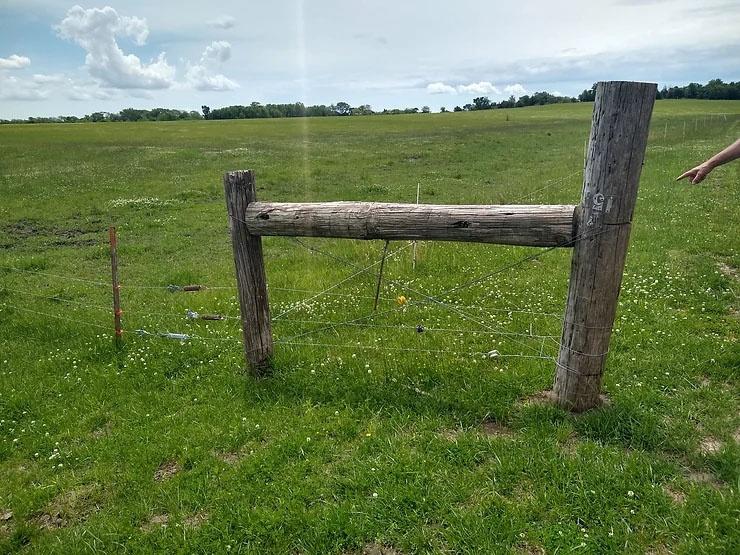
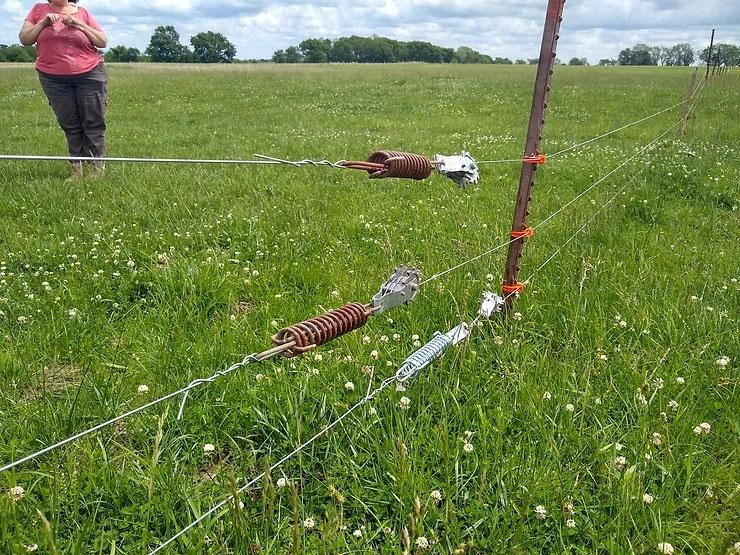
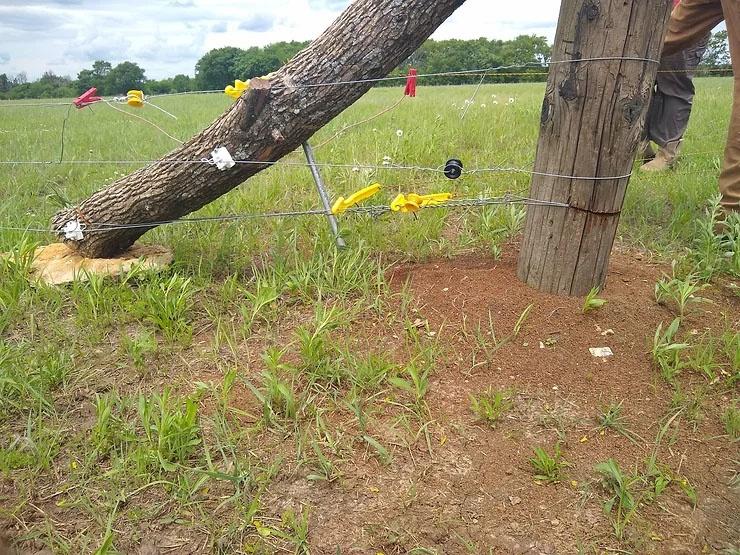
Hank’s wife, Joanna, joins us as we emerge from the barn and enter the steel tube gate to the back pastures. We walk a couple of minutes and encounter an H-post (Figure 2), with a single strand of poly wire running one direction and three high tensile wires (HTW) running perpendicular. Hank and Joanna tell us the single strand is enough to deter cattle and dogs. The three strands of HTW are for the sheep. They are tightened using tension springs coupled with ratcheting wire strainers (Figure 3).
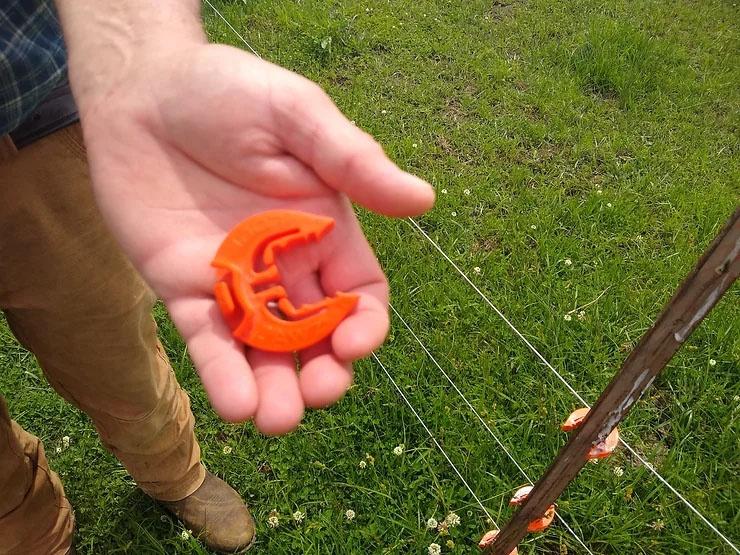
This stretch of HTW runs 1,300′ with a parallel stretch perhaps 600′ apart. T-posts with insulators helped support the wire down the stretch. Hank has tried several kinds of insulators and his current favorite, pictured below (Figure 4), attach to a t-post in several configurations.
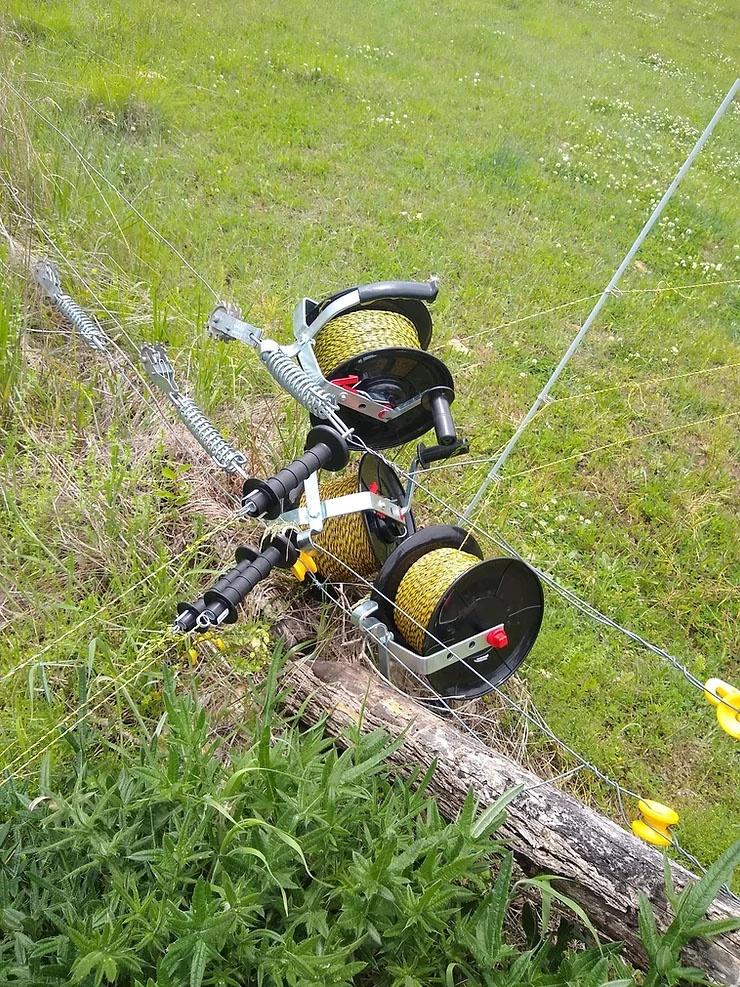
Hank makes smaller paddocks with fiberglass, plastic, or metal stakes with insulators and three strands of polywire, each on geared spools to keep them taught. The polywire is then spliced to the main HTW (Figure 5). In some places polywire is spliced into polywire (Figure 6). For larger fencing systems, there is substantial time and effort saved when using a reel-based electric fence compared to the electric netting fence, which is what we had been using ourselves. A reel-based system is more portable and is malleable to the needs of the rancher and homesteader as per paddock shape and size. See the links at the end of the post for more general information on choosing which fence is best for your situation, electric or otherwise.

We walk along the single strand of polywire for ways and come to a spot where round hay bales were stored for winter cattle feed. A deep mulch is left over. Hank says there are Sericea Lespedeza (a naturalized invasive bush clover) colonies in several paddocks, some of which have been covered with a single round bale over winter. I did not capture a photo of these spots, but it seems to have virtually eliminated new growth of the perennial legume. The sheep will also eat Lespedeza to a degree, provided the plant is not too mature. Goats will readily eat the plant at all stages. They do not mind the high tannin content that makes it less palatable to other livestock. Cutting Lespedeza for hay before budding decreases tannin levels as it dries to become palatable to cattle.
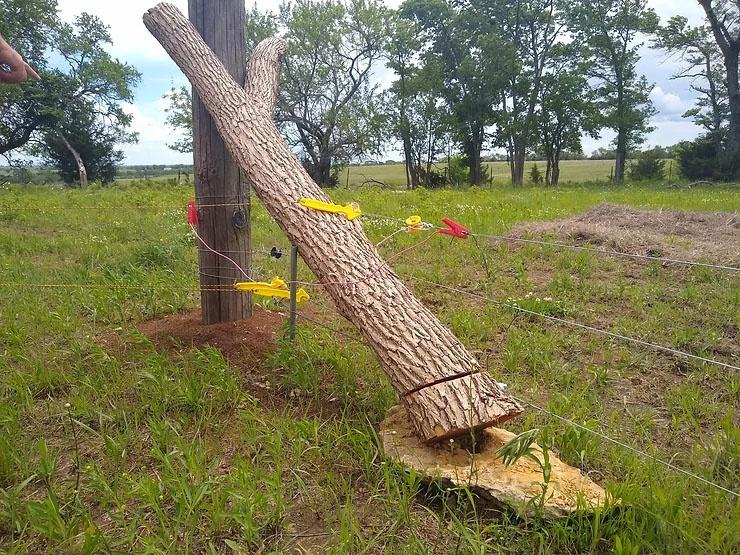
Coming back to the HTW fence, we walk along the 1,300-foot length to reach the other end where a different style of corner brace is being used. Called an angled floating brace (figure 7), Hank says there are many advantages to this as opposed to the standard H-brace. It works by allowing all the brace components, minus the actual post being braced, to be flexible under different forces and conditions on the fence. The tension wire is notched into the bottom of both the post and brace and can be better seen on the back side (figure 8). Here is a bracing chapter of a longer publication on Fencing Systems for Rotational Grazing from Wisconsin Extension.
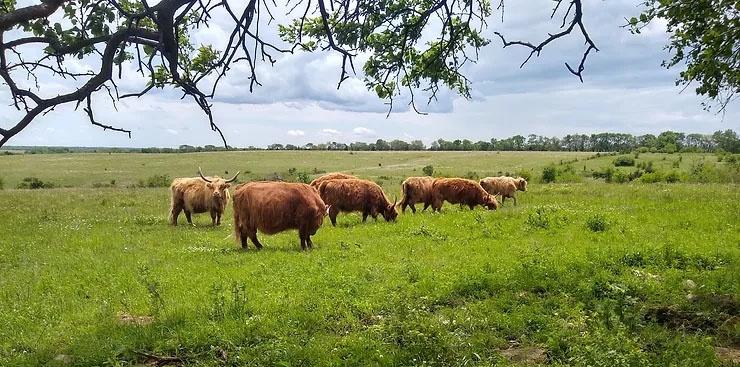
Finally, we meet the charming highland cattle herd. We hop over several polywire fences to reach them. The clouds were building in the distance (figure 9). It was time to head back before the storm hit.
Please feel free to send any follow-up questions to KPI via email and look out for another blog post soon.
You can learn more about and shop for electric fencing in the following links:
- https://www.kcare.k-state.edu/training_events/fencing.html
- https://am.gallagher.com/Solutions/Case-Study-Listings/An-Introduction-into-Electric-Fencing
- https://www.premier1supplies.com/a/common-electric-fence-questions
- or the many other methods of fencing available for the farm considered here:
https://extension.uga.edu/publications/detail.html?number=C774&title=Fences%20for%20the%20Farm
All photos are subject to copyright.